1:准备:
??? JDK:http://www.oracle.com/technetwork/java/javase/downloads/jdk6downloads-1902814.html
??? eclipse:http://www.eclipse.org/downloads/download.php?file=/technology/epp/downloads/release/juno/SR2/eclipse-jee-juno-SR2-win32.zip
??? tomcat:http://tomcat.apache.org/download-60.cgi
??? axis2:http://axis.apache.org/axis2/java/core/download.cgi
??? eclipse的官方提供的axis插件工具,可以打包aar文件和生成客户端调用代码:http://axis.apache.org/axis2/java/core/tools/index.html
??????? 其中的Service Archive Wizard - Eclipse Plug-in和Code Generator Wizard - Eclipse Plug-in
下载完成的软件如图1.1

图1.1
2:配置环境:
??? 2.1:配置java环境变量(不赘述)。
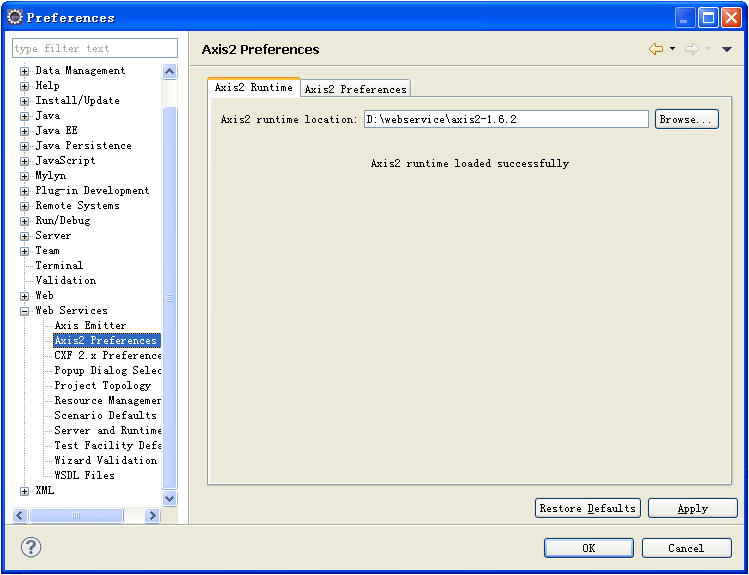
??? 2.1:eclipse中axis2环境配置:Window->Perferences->Web Services->Axis2 perferences->Axis2 Runtime->Axis2 Runtime location,Browse选择解压axis2-1.6.2-bin.zip得到的axis2-1.6.2文件目录。如图2.1。

图2.1
??? 2.2:安装插件:解压axis2-eclipse-codegen-plugin-1.6.2.zip和axis2-eclipse-service-plugin-1.6.2.zip,把得到的两个jar包放入eclipse目录下的plugins中,重启eclipse。
??? 2.3:配置tomcat:解压apache-tomcat-6.0.36-windows-x64.zip(不赘述)。
??? 2.4:eclipse中tomcat配置:Window->Perferences->Server->Runtime Environments添加。
3:发布axis2:
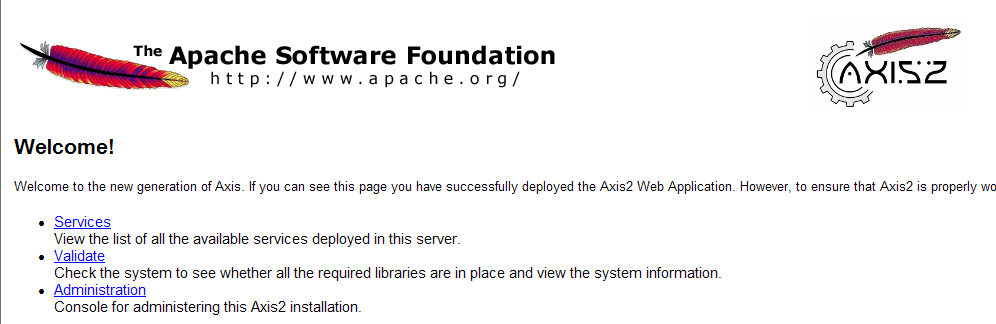
??? 3.1:解压axis2-1.6.2-war.zip获得axis2.war并把它放到tomcat解压目录的webapps文件夹下,启动tomcat,浏览器中输入http://localhost:8080/axis2/,出现图3.1,说明配置成功。
图3.1
??? 3.2:用eclipse的axis2插件发布web服务。
??????? 3.2.1??? 在eclipse中new一个Dynamic Web Project,取名webserviceService。编写一个简单的webService服务器代码
1 package org.web.service;
2
3 public class HelloWorldService {
4 public String sayHello(String name){
5 return "Hello," + name;
6???? }
7 }
8
??????? 3.2.2??? 在eclipse的空白workspace处,右键new->Other,在弹出的对话框中,找到Axis2 Service Archiver,双击->选择HelloWorldService所在项目的class路径,如图3.2
图3.2
next->选中skip WSDL,Next->什么都不填NEXT->选中Generate the service xml automatically,NEXT->
图3.3
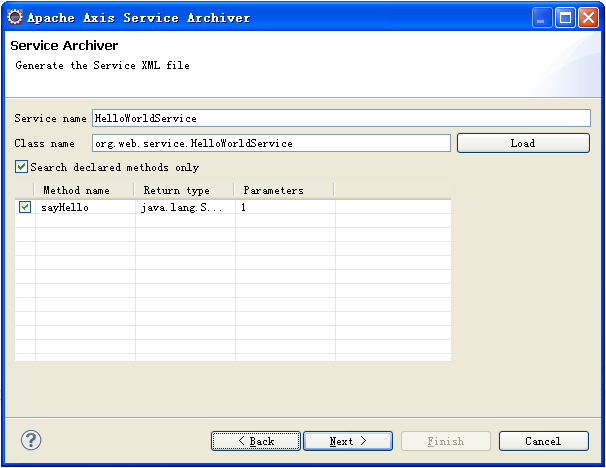
如如图3.3填写HelloWorldService类的全路径,点击load,在下面的Method表中出现sayHello说明load成功,点击NEXT->
图3.4
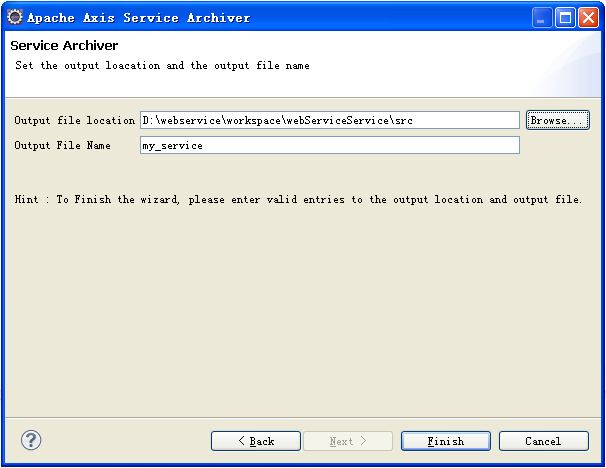
??? 填写Output file location,点击Finish,如图3.4。
??????? 3.2.2??? 右键点击webServiceService项目,刷新。出现my_service.aar文件,如图3.5。
图3.5
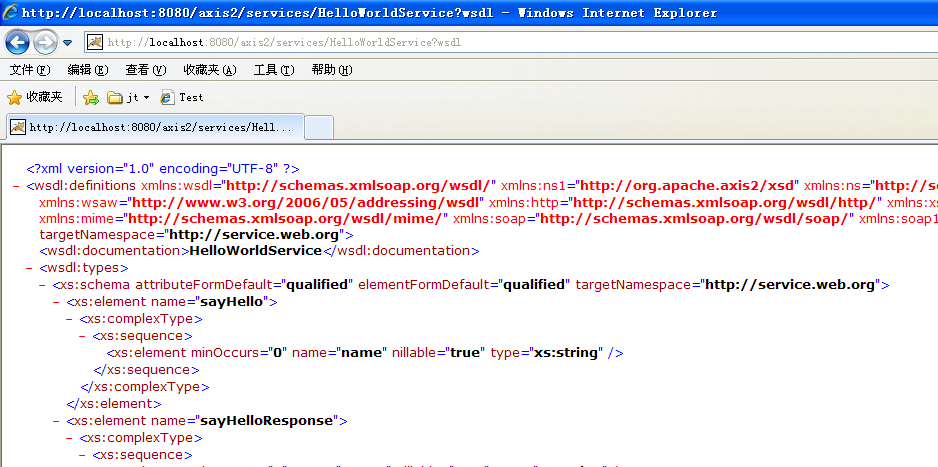
??? 把此aar文件放到%tomcat_home%webappsaxis2WEB-INFservices下。浏览器中输入http://localhost:8080/axis2/services/HelloWorldService?wsdl,出现图3.6,说明发布成功。
图3.6
4:用eclipse的Web Service Client生成客户端调用代码。
??? 4.1:在eclipse的空白workspace处右键new->Other->Web services->Web Service Client,选中,点击NEXT->出现图4.1
图4.1
service definition填发布好的wsdl路径http://localhost:8080/axis2/services/HelloWorldService?wsdl,Client type默认,下面的下滑快拉到最上面,点击Server runtime:Tomcat v6.0 Server出现图4.2:
图4.2
在Server runtime中选择默认,Web service runtime选择Apache Axis2,点击Ok,返回图4.1,点击Client project:webServiceClient,出现图4.3
图4.3
在Client project的下拉列表中选择客户端代码存放的项目,本例选择webServiceClient。点击OK,返回图4.1,点击NEXT,进入下一个环节,然后点击Finish。
,
图4.4
如图4.4,在src的source folder下出现org.web.service包,下面有HelloWorldServiceCallBackHandler.java和HelloWorldServiceStub.java文件,Web App Libraries也有更新,在WebContent目录下也出现axis2-web文件夹,以及WEB-INF等的更新。
??? 4.2:写webService调用代码。
??????????? 在webServiceClient项目中新建一个客户端测试文件如下:
1 package org.web.client;
2
3 import java.rmi.RemoteException;
4
5 import org.web.service.HelloWorldServiceStub;
6 import org.web.service.HelloWorldServiceStub.SayHelloResponse;
7
8 public class HelloWorldClient {
9
10 /**
11????? * @param args
12????? * @throws RemoteException?
13 */
14 public static void main(String[] args) throws RemoteException {
15???????? String target = "http://localhost:8080/axis2/services/HelloWorldService";
16???????? HelloWorldServiceStub stub = new HelloWorldServiceStub(target);
17 // sayHello 为webService提供参数
18???????? HelloWorldServiceStub.SayHello sayHello = new HelloWorldServiceStub.SayHello();
19???????? sayHello.setName("jackii");
20???????? SayHelloResponse eur = stub.sayHello(sayHello);
21???????? String returnVal = eur.get_return();
22???????? System.out.println(returnVal);
23???? }
24
25 }
运行上面代码Run As->Java Application,输出:
Hello,jackii
说明调用成功。
5:参考文档http://wenku.baidu.com/view/12501ed7195f312b3169a54b.html
6:服务端接收的参数为javaBean,返回list样例:
??? 6.1:创建服务。新建User.java
1 package org.web.service;
2
3 public class User {
4 private String id;
5 private String name;
6 public String getId() {
7 return id;
8???? }
9 public void setId(String id) {
10 this.id = id;
11???? }
12 public String getName() {
13 return name;
14???? }
15 public void setName(String name) {
16 this.name = name;
17???? }
18 }
19
ListService.java
1 package org.web.service;
2
3 import java.util.ArrayList;
4 import java.util.List;
5
6 public class ListService {
7 public List<User> getUserList(User user){
8???????? List<User> returnList = new ArrayList<User>();
9???????? returnList.add(user);
10 for(int i=0;i<3;i++){
11???????????? User user1 = new User();
12???????????? user1.setId("00"+i);
13???????????? user1.setName("jack00"+i);
14???????????? returnList.add(user1);
15???????? }
16 return returnList;
17???? }
18 }
文件目录如图6.1:
图6.1
按照3.2说明重新发布服务(图3.4Output File Name重新起个名字)
6.2:创建客户端调用代码,步奏同4。得到图6.2所示两个文件ListServiceStub.java和ListServiceCallbackHandler.java
图6.2
创建ListServiceClient.java
1 package org.web.client;
2
3 import java.rmi.RemoteException;
4
5 import org.web.service.ListServiceStub;
6 import org.web.service.ListServiceStub.GetUserListResponse;
7 import org.web.service.ListServiceStub.User;
8
9 public class ListServiceClient {
10
11 /**
12????? * @param args
13????? * @throws RemoteException?
14 */
15 public static void main(String[] args) throws RemoteException {
16???????? String target = "http://localhost:8080/axis2/services/ListService";
17???????? ListServiceStub stub = new ListServiceStub(target);
18???????? ListServiceStub.GetUserList getUserList0 = new ListServiceStub.GetUserList();
19???????? User user = new User();
20???????? user.setId("clientTest");
21???????? user.setName("ClientName");
22???????? getUserList0.setUser(user);
23???????? GetUserListResponse eur = stub.getUserList(getUserList0);
24???????? User[] userArray = eur.get_return();
25 for(int i=0;i<userArray.length;i++){
26???????????? System.out.println("id:"+userArray[i].getId()+"name:"+userArray[i].getName()+"n");
27???????? }
28???? }
29 }
以java application方式运行,输出:
1 id:clientTestname:ClientName
2
3 id:000name:jack000
4
5 id:001name:jack001
6
7 id:002name:jack002
说明调用成功。