filebeat日志收集
发布时间:2020-12-14 02:05:02 所属栏目:Linux 来源:网络整理
导读:#(1)filebeat下载 https://artifacts.elastic.co/downloads/beats/filebeat/filebeat-5.4.0-linux-x86_64.tar.gz #(2)构建filebeat镜像 1)准备dockerfile文件 # cat dockerfileFROM docker.io/centosWORKDIR /usr/localCOPY filebeat-5.4.0-linux-x86_6
|
#(1)filebeat下载
https://artifacts.elastic.co/downloads/beats/filebeat/filebeat-5.4.0-linux-x86_64.tar.gz #(2)构建filebeat镜像 1)准备dockerfile文件 # cat dockerfile FROM docker.io/centos WORKDIR /usr/local COPY filebeat-5.4.0-linux-x86_64.tar.gz /usr/local RUN cd /usr/local && tar xvf filebeat-5.4.0-linux-x86_64.tar.gz && rm -f filebeat-5.4.0-linux-x86_64.tar.gz && ln -s /usr/local/filebeat-5.4.0-linux-x86_64 /usr/local/filebeat && chmod +x /usr/local/filebeat/filebeat && mkdir -p /etc/filebeat ADD ./docker-entrypoint.sh /usr/bin/ RUN chmod +x /usr/bin/docker-entrypoint.sh ENTRYPOINT ["docker-entrypoint.sh"] CMD ["/usr/local/filebeat/filebeat","-e","-c","/etc/filebeat/filebeat.yml"] 2)准备docker-entrypoint.sh # cat docker-entrypoint.sh #!/bin/bash config=/etc/filebeat/filebeat.yml env echo ‘Filebeat init process done. Ready for start up.‘ echo "Using the following configuration:" cat /etc/filebeat/filebeat.yml exec "[email?protected]" [[email?protected] logs]# cat docker-entrypoint.sh #!/bin/bash config=/etc/filebeat/filebeat.yml env echo ‘Filebeat init process done. Ready for start up.‘ echo "Using the following configuration:" cat /etc/filebeat/filebeat.yml exec "[email?protected]" 3)构建 1)准备filebeat配置文件, # cat configmap.yaml
apiVersion: v1
kind: ConfigMap
metadata:
name: filebeat-config
data:
filebeat.yml: |
filebeat.prospectors:
- type: log
paths:
- "/log/*"
output.redis:
hosts: ["192.168.1.51:6379"]
key: "nginx-log"
db: 2
tag: "nginx-log"
password: "redhat"
port: 6379
2)准备NGINX的deployment配置清单文件 # cat nginx-deployment.yaml
apiVersion: extensions/v1beta1
kind: Deployment
metadata:
name: nginx-test
namespace: default
spec:
replicas: 1
template:
metadata:
labels:
k8s-app: nginx-test
spec:
containers:
- image: registry.cn-hangzhou.aliyuncs.com/wangfang-k8s/filebeat-v5.4.0
imagePullPolicy: Always
name: filebeat
volumeMounts:
- name: app-logs
mountPath: /log
- name: filebeat-config
mountPath: /etc/filebeat/
- image: nginx:1.11
name : nginx-test
imagePullPolicy: Always
ports:
- containerPort: 80
volumeMounts:
- name: app-logs
mountPath: /var/log/nginx
volumes:
- name: app-logs
emptyDir: {}
- name: filebeat-config
configMap:
name: filebeat-config
3)准备nginx-service的资源配置清单文件 # cat service.yaml
apiVersion: v1
kind: Service
metadata:
name: nginx-test
spec:
selector:
k8s-app: nginx-test
ports:
- name: http
nodePort: 38888
port: 89
protocol: TCP
targetPort: 80
type: NodePort
4)部署
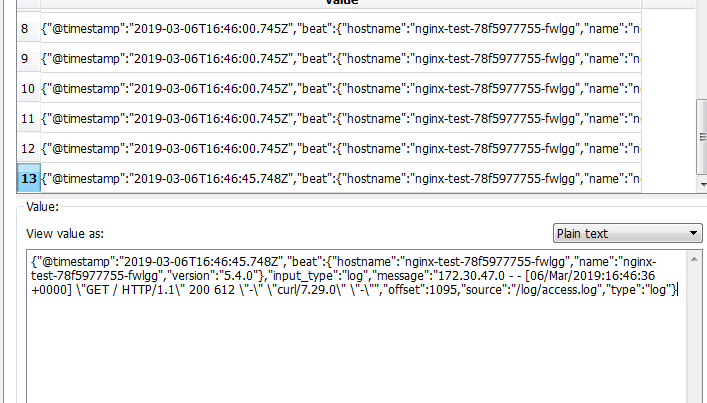
5)访问nginx 6)登录到redis查看是否有日志
(编辑:李大同) 【声明】本站内容均来自网络,其相关言论仅代表作者个人观点,不代表本站立场。若无意侵犯到您的权利,请及时与联系站长删除相关内容! |