webservice axis2框架下的发布
1.参考文献:1.利用Java编写简单的WebService实例 ?http://nopainnogain.iteye.com/blog/791525 2.Axis2与Eclipse整合开发Web Service ?http://tech.ddvip.com/2009-05/1242968642120461.html 3.http://blog.csdn.net/lightao220/article/details/3489015 4.http://clq9761.iteye.com/blog/976029 5.使用Eclipse+Axis2+Tomcat构建Web Services应用(实例讲解篇) 2.实例1(主要看到[2])2.1.系统功能:?
开发一个计算器服务CalculateService,这个服务包含加(plus)、减(minus)、乘(multiply)、除(divide)的操作。
2.2.开发前准备:
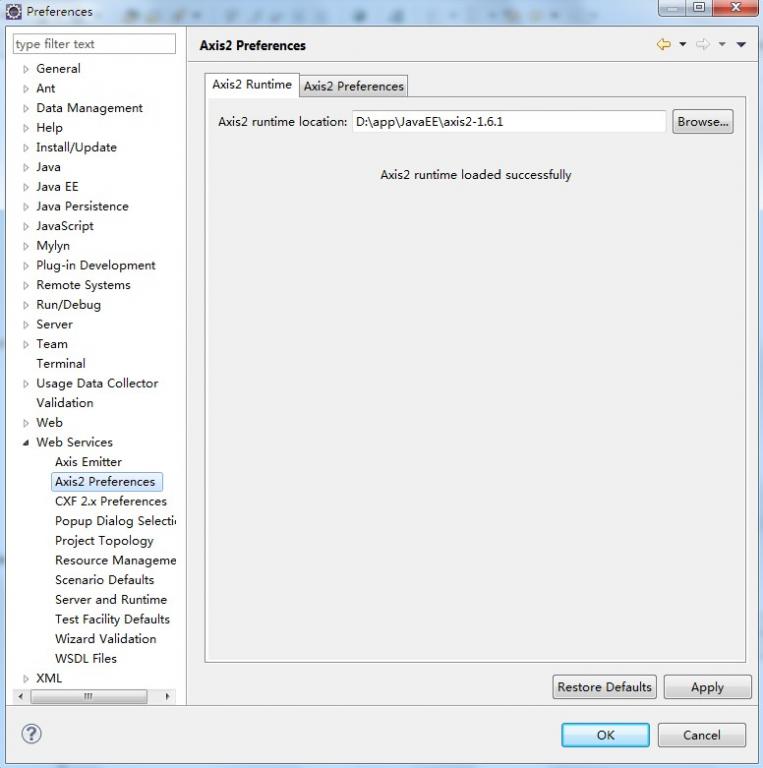
2.3.开发前配置:在Eclipse的菜单栏中,Window --> Preferences --> Web Service --> Axis2?Perferences,在Axis2 runtime location中选择Axis2解压缩包的位置,设置好后,点"OK"即行。(如图)
2.4.开发Web Service: (1)新建一个Java Project,命名为"WebServiceTest1"
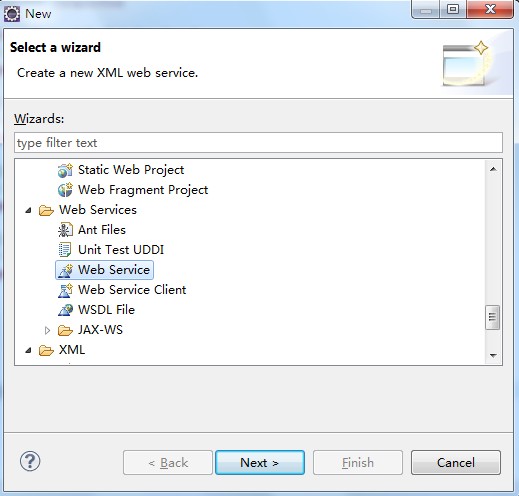
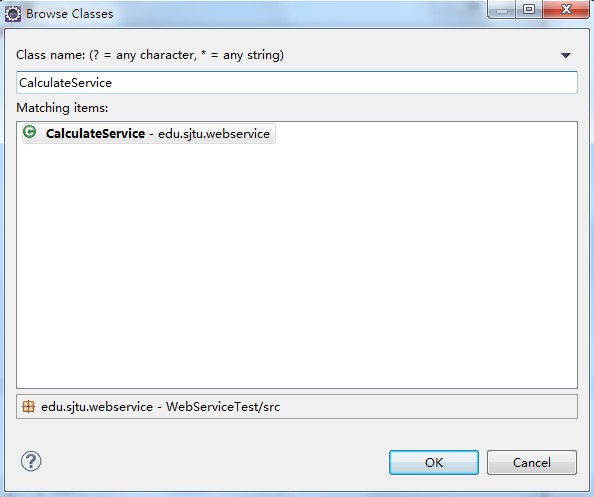
(4)下一步(next),在出现的Web Services对象框,在Service implementation中点击"Browse",进入Browse Classes对象框,查找到我们刚才写的写的CalculateService类。(如下图)。点击"ok",则回到Web Service话框。
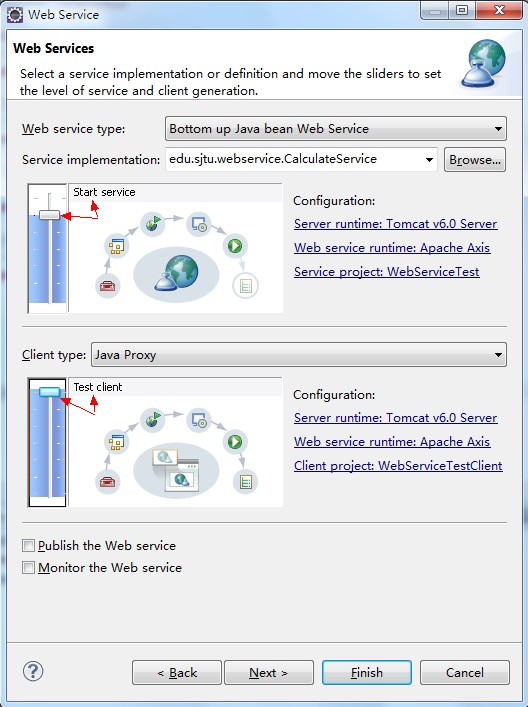
(5)在Web Service对话框中,将Web Service type中的滑块,调到"start service“的位置,将Client?type中的滑块调到"Test client"的位置。
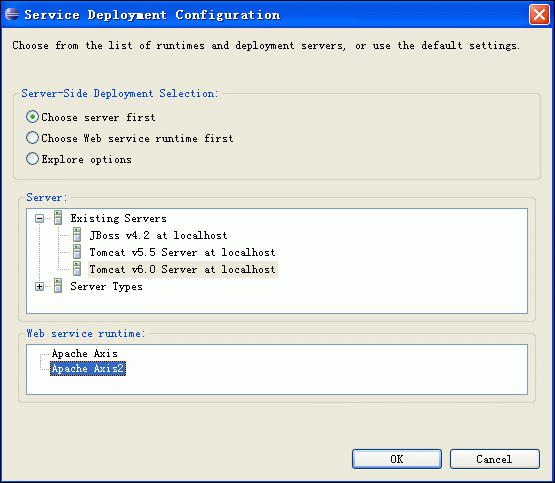
(6)在Web Service type滑块图的右边有个"Configuration",点击它下面的选项,进入Service Deployment Configuration对象框,在这里选择相应的Server(我这里用Tomcat6.0)和Web Service runtime(选择Apache Axis2),如下图:
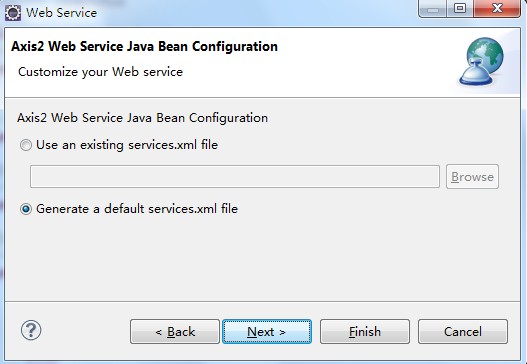
(7)点OK后,则返回到Web Service对话框,同理,Client type中的滑块右边也有"Configuration",也要进行相应的置,步骤同上。完成后,Next --> next即行。进入到Axis2 Web Service Java Bean Configuration,我们选择Generate a default services.xml,如下图所示:
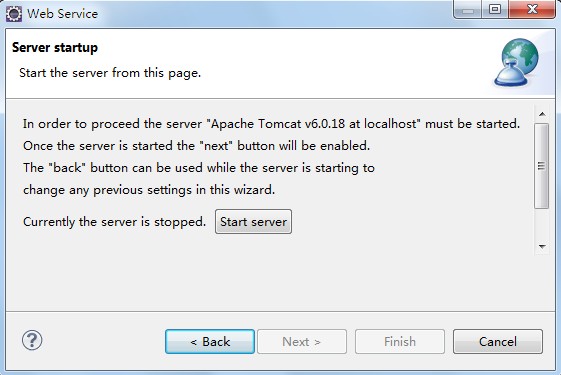
(8)到了Server startup对话框,有个按键"start server"(如下图),点击它,则可启动Tomcat服务器了。
(9)等启完后,点击"next -- > next",一切默认即行,最后,点击完成。最后,出现如下界面:(Web?Service Explorer),我们在这里便可测试我们的Web服务。(使用浏览器打开的话使用如下地址:http://127.0.0.1:19189/wse/wsexplorer/wsexplorer.jsp?org.eclipse.wst.ws.explorer=3)。如下图所示:
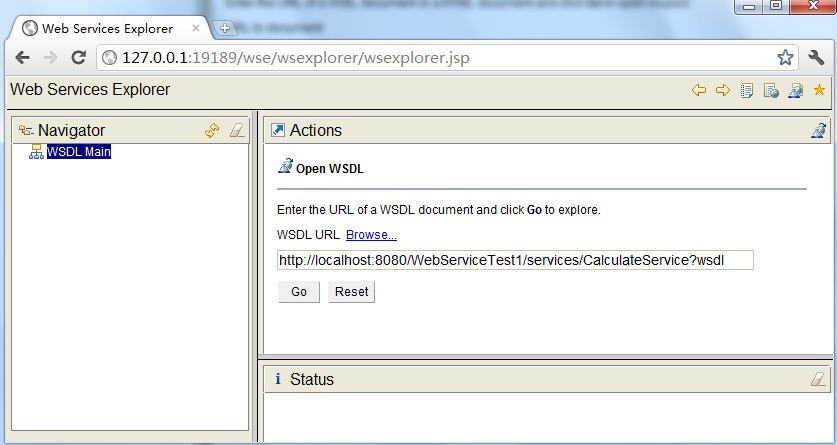
注:在浏览器中打开Web Service Explorer(有时候在eclipse中关闭了webservice explorer,可以用这种方法打开)首先登录地址:http://127.0.0.1:19189/wse/wsexplorer/wsexplorer.jsp。然后在网页右上角选择Web Service Exoplorer标签。然后输入WSDL地址:http://localhost:8080/WebServiceTest1/services/CalculateService?wsdl 。这个wsdl地址就是我们刚才发布服务的那个wsdl。点击go,如下图所示:
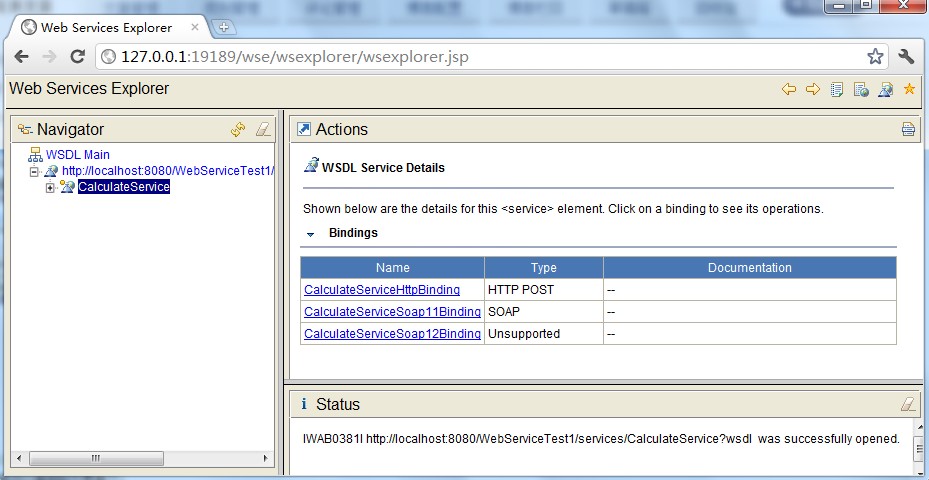
然后就可以看到如下界面了:
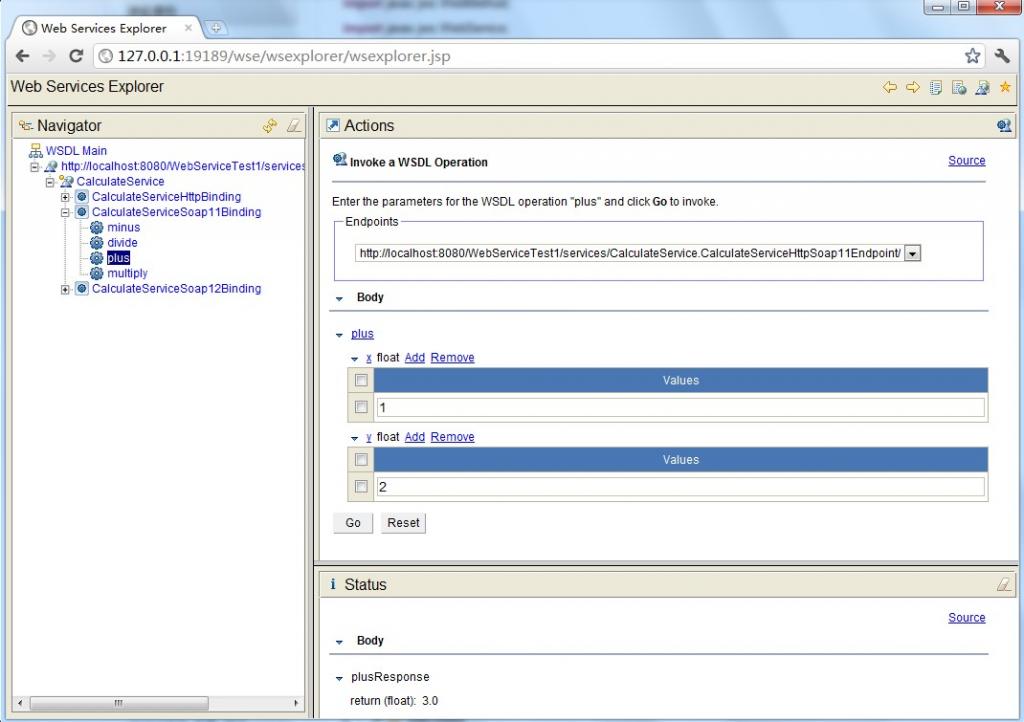
(10)测试比较简单,例如,我们选择一个"plus"的Operation(必须是CalculateServiceSoap11Binding),出现下图,在x的输入框中输入1,在y的输入框中输入2,点击"go",便会在status栏中显示结果3.0。其他方法的测试也类似。结果如上图所示。
|