seafile7.0.3安装
|
1.查看系统版本和系统内核
命令: cat /etc/redhat-release uname -r
2.编辑selinux文件,关闭selinux(需要重启计算机才能生效)
不重新启动关闭selinux生效方法
3.查看并关闭开机自动启动防火墙
关闭防火墙开机自动启动(重启生效)
临时关闭防火墙(立即生效)
4.安装组件包
4.2 安装nux
4.3 安装python-pip
对pip进行更新
更新setuptools工具
4.4 安装其它的依赖组件包
4.5 安装pillow moviepy
5.启动mariadb数据库
对数据库进行密码设置(数据库root用户的密码) 命令:mysql_secure_installation
登录数据库
创建seafile需要的数据库及用户,并对此些数据库进行授权 create database ccnet_db character set = ‘utf8‘; create database seafile_db character set = ‘utf8‘; create database seahub_db character set = ‘utf8‘; create user [email?protected]‘192.168.80.%‘ identified by ‘b123456‘; grant all privileges on ccnet_db.* to [email?protected]‘192.168.80.%‘ identified by ‘b123456‘; grant all privileges on seafile_db.* to [email?protected]‘192.168.80.%‘ identified by ‘b123456‘; grant all privileges on seahub_db.* to [email?protected]‘192.168.80.%‘ identified by ‘b123456‘;
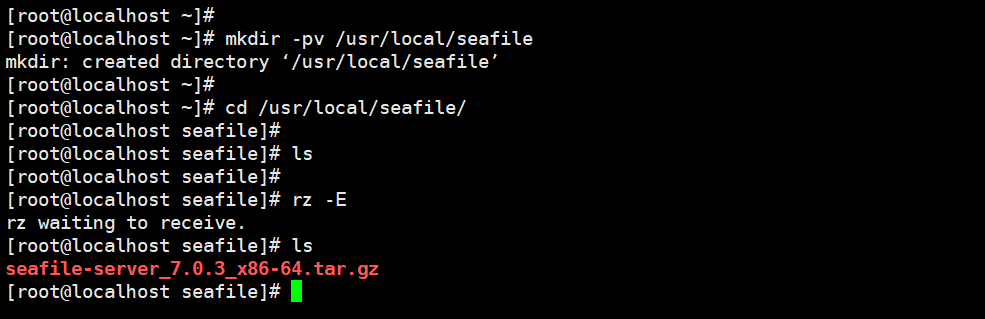
6.从官网上下载最新版的seafile-server文件(最新版本为:seafile-server-7.0.3并上传至服务器指定的目录)
上传文件至指定的目录(/usr/local/seafile),如seafile目录不存在,则新建此目录 命令: mkdir -pv /usr/local/seafile cd /usr/local/seafile
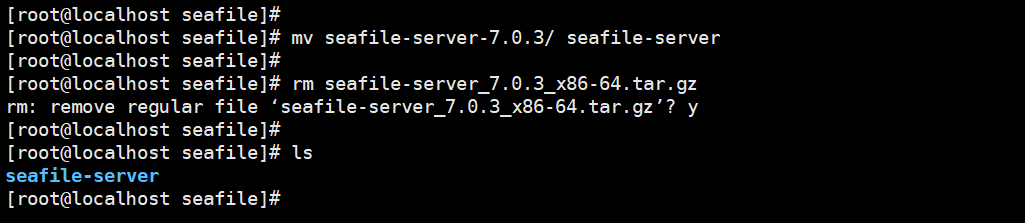
7.解压seafile-server文件
8.对解压出来的目录seafile-server-7.0.3进入改名并删除上传的tar.gz文件
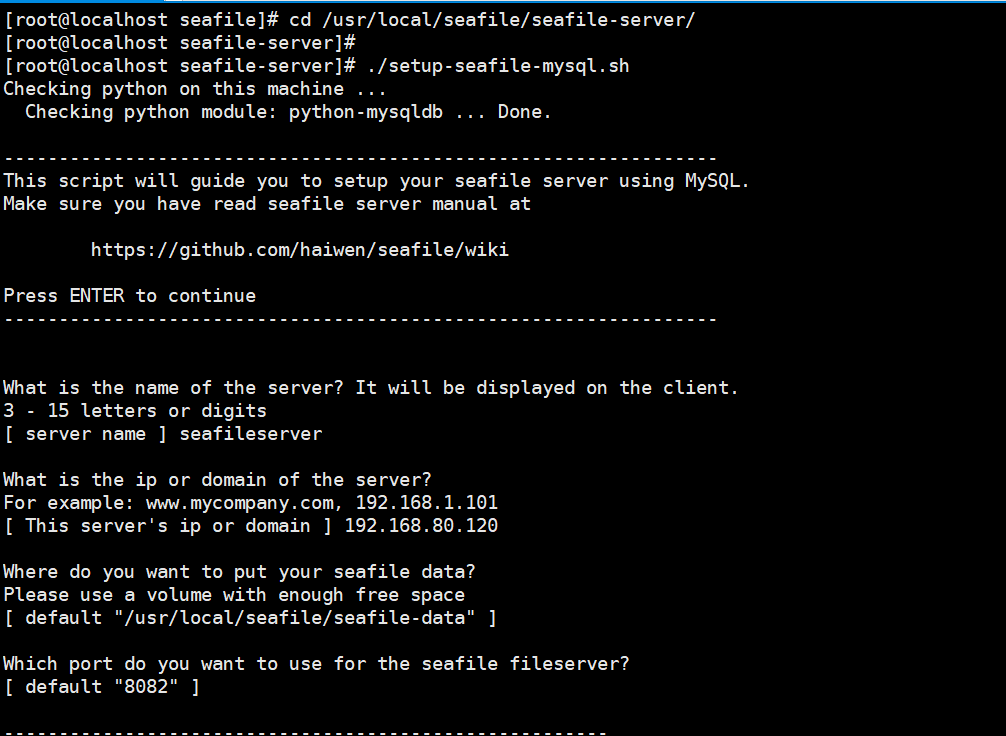
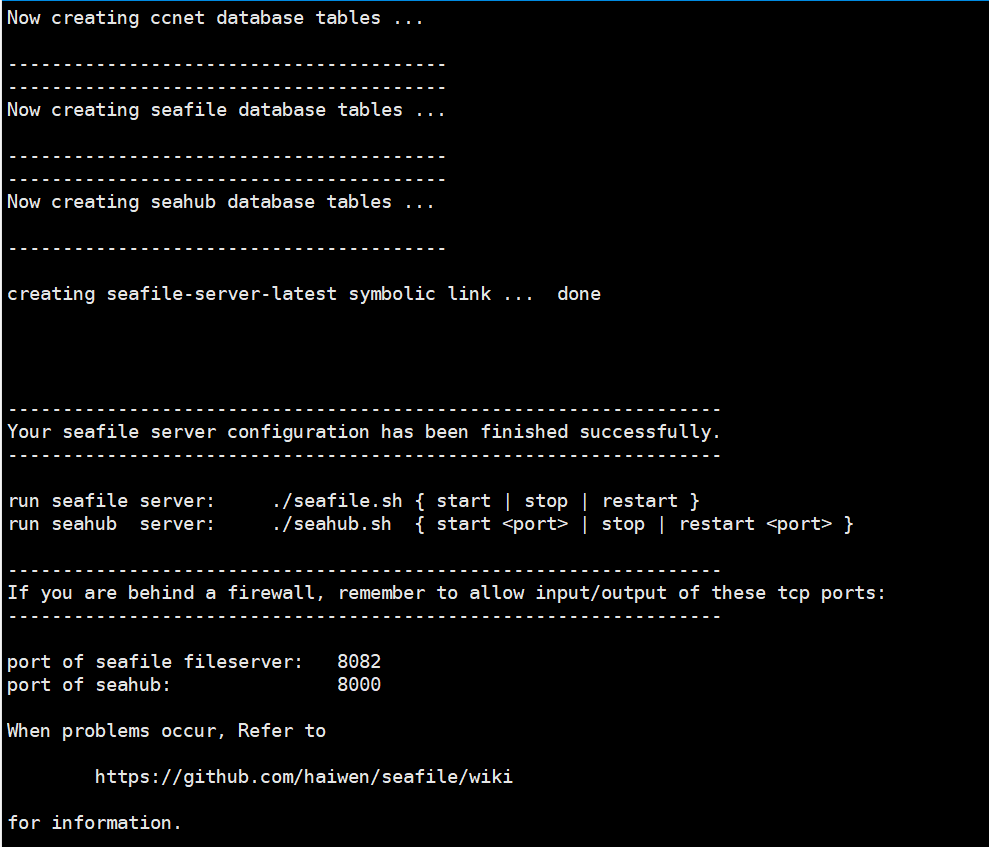
9.安装seafile 命令:
10.启动seafile 命令: cd /usr/local/seafile/seafile-server ./seafile.sh start
11.启动seahub, 开初始化web页面的用户名和密码(第一次运行)
12.安装完成了seafile7.X,默认是不允许直接使用ip:端口访问(192.168.80.120:8001),如果需要使用(192.168.80.120:8001)来访问,修改/usr/local/seafile/conf/gunicorn.conf文件,把里面的 bind="127.0.0.1:8000"修改为bind="0.0.0.0:8001" 命令: cd /usr/local/seafile/conf vi gunicorn.conf
13.重新启动seahub
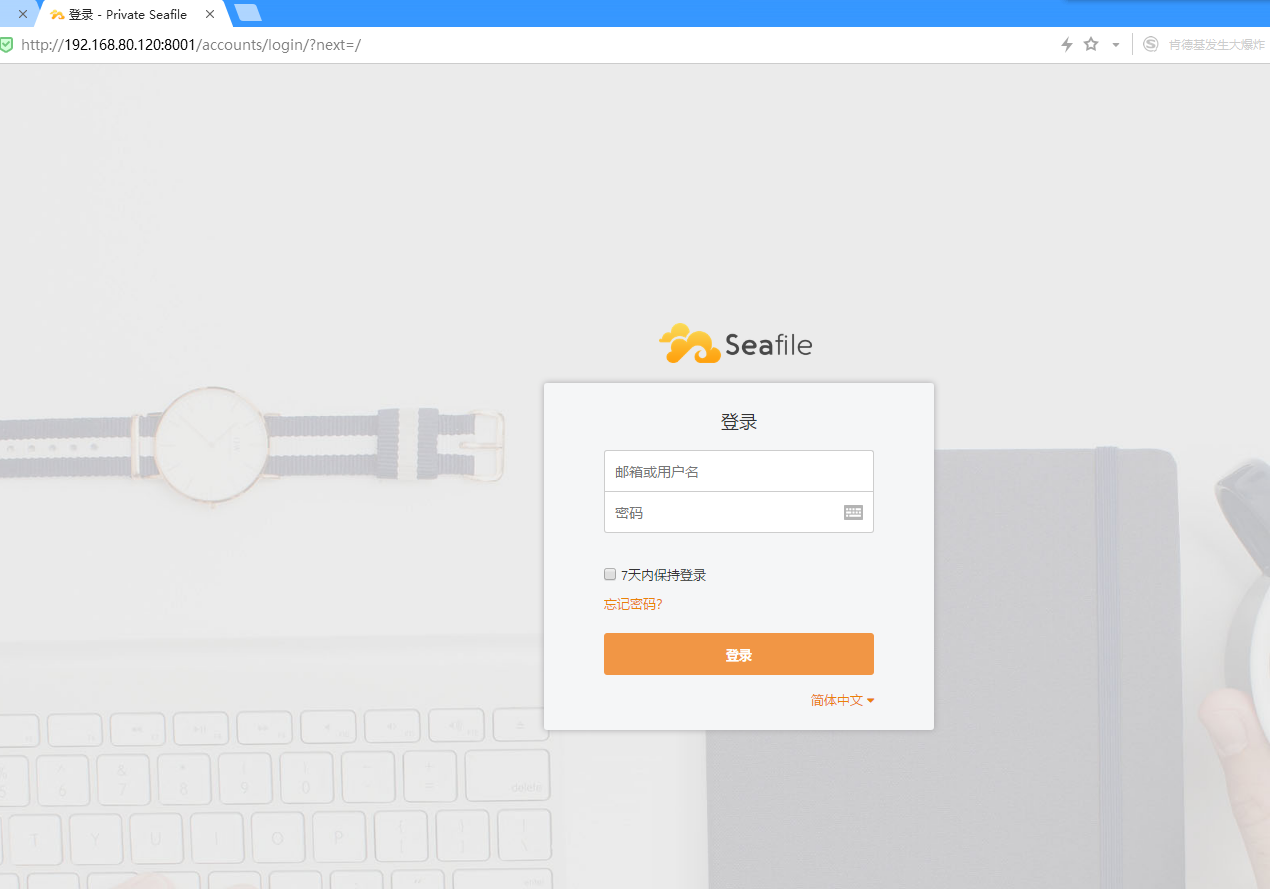
14.打开网页,在地址栏处输入:http://192.168.80.120:8001即可访问seafile了
(编辑:李大同) 【声明】本站内容均来自网络,其相关言论仅代表作者个人观点,不代表本站立场。若无意侵犯到您的权利,请及时与联系站长删除相关内容! |